What's Up, Cupcake? Menu

Monday, October 31, 2011

Little Bo Peep... and her Sheep


Those of you who follow What's Up, Cupcake? on Facebook and Twitter may have seen my costume dilemmas.  This was actually a very fun and easy costume to make, the only challenge was that the cover drawing on the pattern was very much an animation, so I wasn't sure how long the dress would actually be.


I started by adding two inches to the skirt, but it was... umm...  scandalous.  I had to go back and re-cut the skirt (luckily I had enough fabric), adding four inches this time. I also made Colette's Madeline Bloomers as back-up in case any big gusts of wind came by.  The extra inches helped, and I was able to finish off my costume.  The hubby was also willing to go along with the theme (such a trooper) and so I drafted up a sheep costume for him.


Fabric: Blue and white cotton for Bo Peep, fuzzy sherpa-type fabric for the sheep.
Pattern: Simplicity 2072 for Little Bo Peep.  None for the sheep.
Notions: Lace trim for Bo Peep's sleeves.


We had a fun Halloween.  Our neighborhood gets a lot of trick or treaters and some of the houses get pretty into it.  We just carved some pumpkins, I took my little dance sister out for candy, and afterwards the hubby and I sat out decked out in our gear, giving out candy.  Hope you all had a fun Halloween too!

Saturday, October 29, 2011

Sweet Treats Saturday: Sugar and Spice Pecans

These candied pecans are one of my favorite holiday treats.  They're great for any time of year, but I always end up making them for the holidays.  They are the perfect, jar-friendly, easy-to-make, edible gift. Oh, and they're soooo yummy!  Really, I promise.  I made a batch for work and everyone was asking for the recipe.  Make them - you won't regret it.


I used the same jars as my cupcakes-in-a-jar.  Small, 8oz, canning jars.  You can buy these online, at many grocery stores (in the baking or canning section), and some craft stores.  I picked up a flat of a dozen for $8 at Wal-mart.

Sugar and Spice Pecans
Recipe from a friend

Ingredients:
1 lb pecans (4 cups)
1/2 cup sugar
2 1/2 tbsp corn oil
1 tbsp vanilla

Spice Mix (Combine to coat the nuts after baking):
1/2 tsp salt
1/4 tsp pepper
1/4 tsp coriander
1/4 tsp cinnamon
1/4 tsp nutmeg
1/4 tsp all-spice

Preheat oven to 350 degrees.

Boil water.  Add pecans and cook for 1 minute, stirring.  Drain pecans and put in medium bowl.  Add the corn oil and vanilla, stirring until the pecans are coated.  Add sugar and stir to coat.  Spread pecans in a single layer on a baking sheet.


Bake pecans for 30 minutes, stirring occasionally to ensure they don't stick or burn.  I stir a minimum of once every 10 minutes.

After 30 minutes, remove nuts from the oven and pour into a medium bowl.  Sprinkle with the spice mix, then stir to coat.  Let cool.


Once the pecans are cooled, you can add them to the jars.  You can fill 5 - 8oz. jars with one batch.  If you have any extras, I love to throw them in a bag, and store in the freezer.  These are delicious at room temperature, but I absolutely love them frozen.


Decorating:
You can decorate these how you like. I did two different options.

1. Wrap a band of ribbon around the top of the lid.  I attached this with double-sided scrapbooking dots.

2. Cut out a piece of fabric (this is perfect for fabric scraps you may have!) a little larger than the lid.  Tie a piece of ribbon, twine or raffia around the lid to hold in place.


If you don't have canning jars, fill plastic bags and tie with ribbon.


This post will be participating in the following Linky parties:

Saturday, October 22, 2011

Sweet Treats Saturday: Red Velvet Cupcakes in a Jar

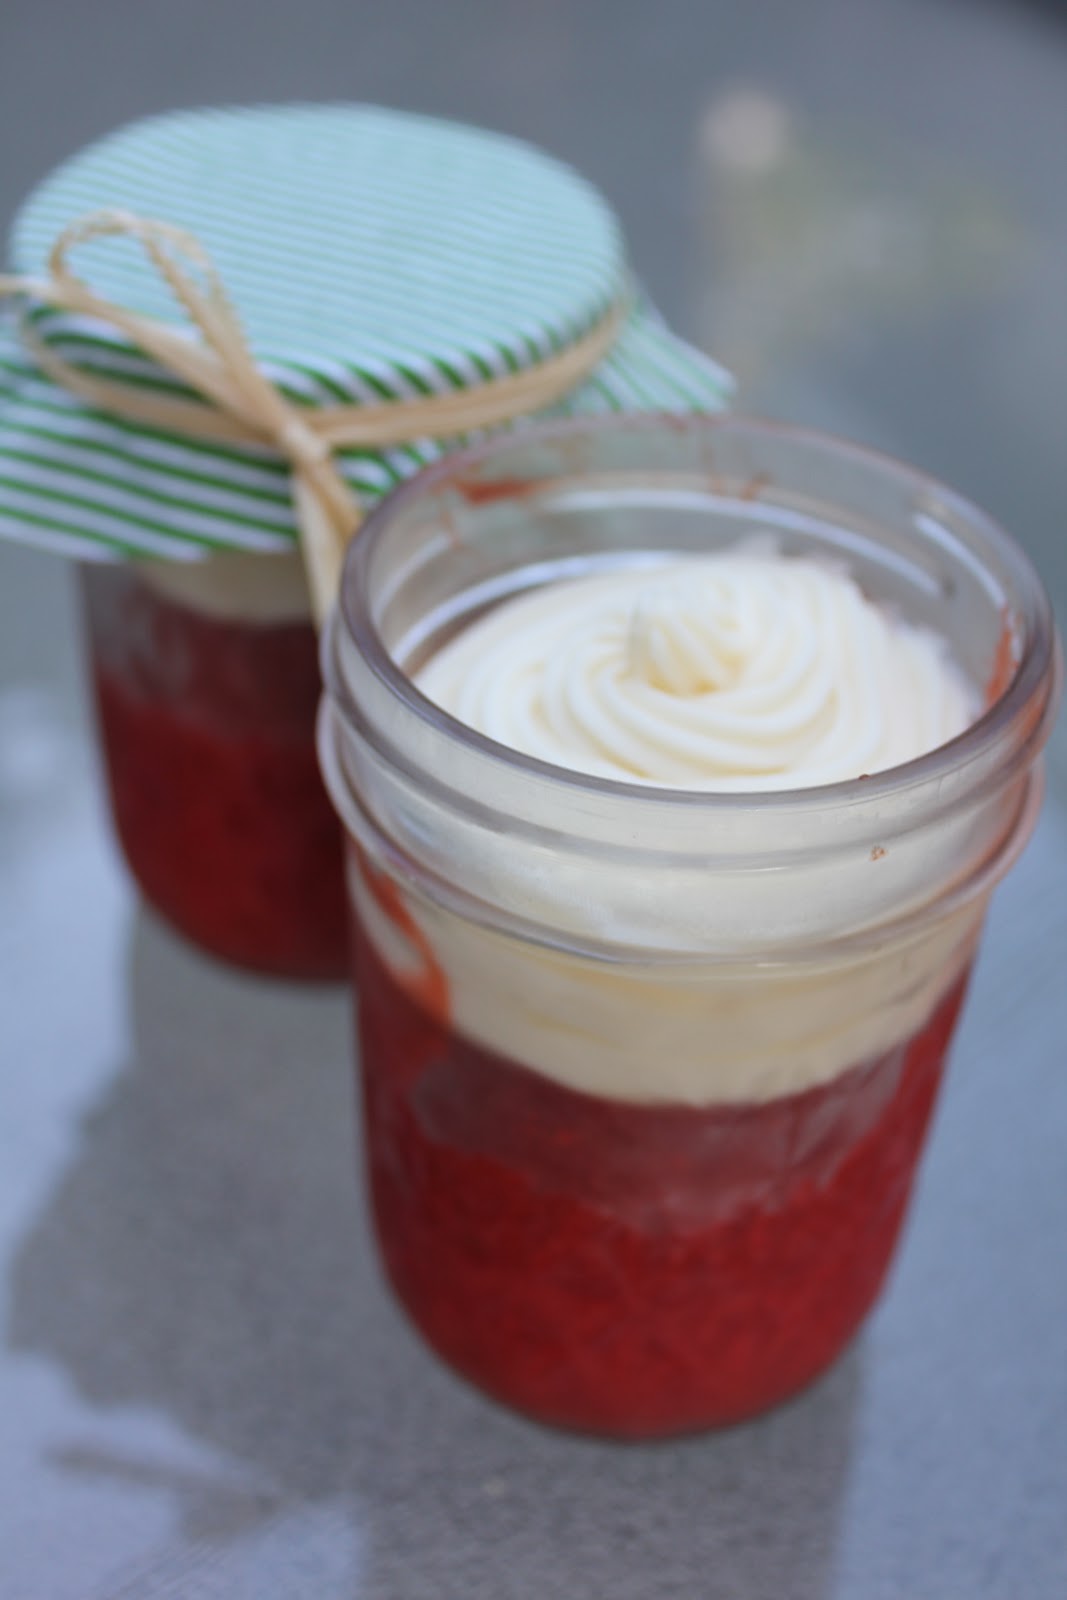
You've probably seen cupcakes in a jar popping up all over the web and in your local bakeries.  There are a few variations that I've seen: ready made cupcakes popped into a jar, cakes cut up into pieces and put into a jar, and those made directly in it.  I'm going to show you how to do the latter.  I think this looks the cleanest of the bunch and is the most novel (a cupcake baked in a jar... what?!).  It's really not difficult to do, but it gets a great reaction from people, and is a great way to give out cupcakes.


These make perfect party favors, gifts for co-workers (especially when you don't want to just leave a cupcake out in the open on their desk), teachers gifts, etc.

What you'll need:
  • Canning jars. I use a minimum 8oz jar as that will hold a standard cupcake.  You can go larger, but consider cooking time, and how to balance the contents.
  • Cake batter and frosting. I made red velvets as they're a great color for the holidays, and can look really good with a contrasting green fabric top.  You can also make blue velvets, funfetti cupcakes, or really anything that you like.  
  • Decorating supplies.  This can be fabric scraps and raffia, ribbon, or even simple card stock cut to fit into the lid of the jar.
That's it!  The canning jars are everywhere, you just have to know where to look.  Check your local craft stores or grocery stores in the canning/baking aisle.  I bought mine a Wal-Mart as they had the best value (a dozen for approx. $8), and the exact size that I was looking for.

Red Velvet Cupcakes with Brown Sugar Cream Cheese Frosting
Recipe from Goodies by Anna

This recipe will make about 2 dozen cupcakes, or the same amount in 8oz jars.

Cupcake Ingredients:
2 1/2 cups cake flour
1 1/2 cups sugar
1 tsp baking soda
1 tbsp cocoa powder
1 tsp salt
2 eggs
1 1/2 cups vegetable oil
1 cup buttermilk
2 tbsp (1 oz) red food coloring
1 tsp vanilla extract
1 tsp white distilled vinegar

Preheat the oven to 350 degrees.

Sift together the flour, sugar, baking soda, cocoa powder, and salt in a medium bowl.

Beat eggs, oil, buttermilk, food coloring, vanilla and vinegar in a large bowl with an electric mixer until well combined.  Add dry ingredients and beat until smooth, about 2 minutes.

Pour batter into the individual cupcake pans or jars.  The same amount of batter would be used for a jar. It should only fill about a quarter full - keep in mind that the jar does not have a wider top portion like a standard cupcake, so it does rise a bit higher.  You still want enough room for frosting.

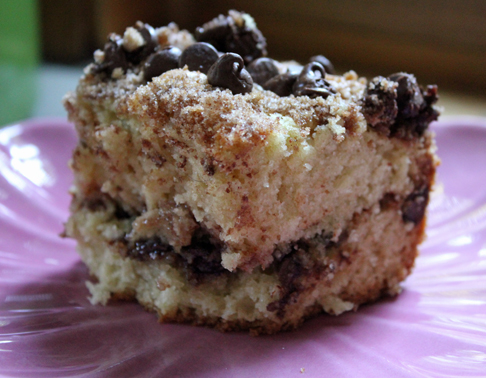
The batter on the left, baked cupcake on the right. It more than doubles in size.

Bake cupcakes until a toothpick inserted in the center comes out clean, about 20-25 minutes.  Let cakes cool completely before frosting.  If you baked them in the canning jars, it will take about an hour before they are cooled enough to add the frosting.

Frosting Ingredients:
*This is the edited frosting to make half a batch.  Goodies by Anna posted the original recipe with the comment that it made far too much so to half it in the future.
3/4 cup butter (one and a half sticks), softened
8 oz cream cheese, softened
2 tbsp light brown sugar, packed
1/2 tsp vanilla extract
pinch of salt
2-3 cups powdered sugar
1-2 tbsp milk depending on desired consistency

Cream the cream cheese in a medium bowl with an electric mixer for 1 minute.  Scrape down the bowl and add the butter, beating for 1-2 minutes, or until incorporated.

Add the brown sugar, pinch of salt, and vanilla extract, and beat until blended.

Turn off the mixer and gradually add the powdered sugar, mixing well in between each addition.  Alternate adding the sugar and milk until the frosting is smooth and has reached your desired consistency.

Once the cupcakes are cool, you can pipe the frosting on.  You can do this with a pastry piping bag, or with a regular plastic bag with a tip cut off.  If it's going into the jar, it doesn't need to look fancy.  Once the cupcakes are frosted, seal the jars and decorate.


I cut out circles slightly larger than the jar lid from scraps of fabric.  Hold down and tie with raffia or ribbon.  You can also attach a spoon to make enjoying the gift easier.


This post will be participating in the following Linky parties:

Monday, October 17, 2011

Covered in Stitches (and Yarn)

I took last week off from my sewing room as things were crazy busy.  We had an out-of-town friend staying with us, and free time was spent bonding over needlecraft activities.  She's a fellow knitter, and I refreshed her memory on how to crochet.  I ended up spending the rest of the week working on my pending needlecraft projects, including a crochet wrap, and my submission for the Covered in Stitches embroidery contest.

Here's a peek at my crochet wrap...


The yarn is by Three Irish Girls, and I picked it up at my LYS, Bobbin's Nest.

I think the green and grey hues of the yarn may actually serve as my main color palette for my winter garments.  I've been pinning a few items and have been leaning towards that color scheme.

I'm over halfway done, having gone through a full skein of the yarn, and am well into the second.

And now, onto my entry for the Covered in Stitches embroidery contest.

He's so flippin' cute!
A few months ago, Feeling Stitchy posted pictures of Jillian Tamaki's needlework book covers for a few Penguin classics.  The covers were gorgeous and had me wanted to snatch up each one of them (Black Beauty, Emma, and the Secret Garden).  I was so inspired by the images that I instantly jumped on Feeling Stitchy's book cover contest.  The challenge? To design your own needlework book cover based off of an existing design.  I instantly knew that I wanted to do the Little Prince.  I love the book and have a mini collection (ok, figurines, postcards, lunch box, a couple of copies of the book in French and English, etc) that I've been hoarding for years.  It's such a beautiful story and I love the illustrations throughout.


I set to work on making a transfer of the design.  With this project, I wanted to try all new things.  In the past, I've mainly done basic cross stitch on heavy Aida fabric.  This time I knew I wanted to use linen, and do crewel embroidery... primarily satin stitch, chain stitch, split stitch, etc.  I used tutorials from all over the web, but primarily from Sublime Stitching who also had the materials I needed for the transfer.

Made the transfer of a tracing of the cover. Colors selected and all ready to be stitched up!
I started stitching my entry, in the meantime seeing that another Little Prince was made. I was bummed but I'm glad to know it's such an inspiring book for so many people.  At the same time, I was enjoying seeing how mine was turning out, and loving the new techniques that I was getting to try. It was also great to see another interpretation of the book.  So on with the stitching I went!


I finally finished my submission this weekend, with it taking just over a month to put together.  I love how it turned out and instantly had ideas in my head for a series of book covers.  These would be so perfect for a library, a child's room, etc.  I've already framed this one... but now I just need to figure out what's next!


If you have a chance, check out the Feeling Stitchy Flickr group.  You can see all of the beautiful submissions so far and even submit your own!

Pincushion Jar Tutorial

I can't believe it's already mid-October! With just a couple of months until the holidays are really upon us, I decided I should get started on my crafty gifts.  I saw these pincushion jars floating around the web in the last year and wanted to put together a tutorial for my version.  They're easy to put together and are a great gift for your crafty friends.

Time:
5-10 minutes.  They come together really fast!

Supplies:
Mason jar - I use 8oz or larger so that it's a decent size to hold sewing notions.
Fabric scrap, cut a few inches larger than the jar lid
Handfill of polyfill/toy stuffing
Small piece of decorative paper
Glue gun


1. If you haven't already, cut your fabric scrap into a circle a couple of inches larger than the jar lid.  I recommend cutting a little larger than you expect as you can always cut back the excess.  Also, trace the inner lid piece onto the decorative paper.  Cut out.


2. Now, take the fabric scrap and place over the main jar lid.  Push stuffing into fabric, and cover with the inner jar lid.  


Pull fabric tightly, adjusting the fill as needed until the pincushion shape is formed.


3.  Cut off excess fabric, so that there is just enough to glue down and seal the pincushion lid.  Using the glue gun, pipe glue onto inner jar lid and press fabric down.


4.  Once the fabric is glued down, apply glue to top of fabric and apply decorative paper.  


Your jar is now complete!  Give as is, or fill with fun items for a craft gift.  You can make a sewing kit by throwing in some little scissors, basic threads, needles, etc.  Other uses could be filling it with buttons, zippers, or other sewing notions.


I'll be posting this on the Crafty Christmas Club blog.  If you haven't been there, it's a great site where people post their holiday tutorials.  Tilly (from Tilly and the Buttons) launched it last year, and it's back for this holiday season.  Go check it out!


This post will be participating in the following Linky parties:

Saturday, October 15, 2011

Sweet Treats Saturday: Pumpkin Cupcakes with Cinnamon Buttercream

'If I'm going to do it, I need to do it this week,' was my thought for the Sweet Treats post for this weekend.  I don't bake with pumpkin often, as I tend to veer away from a strong pumpkin flavor.  I am always hesitant to try recipes with pumpkin, as I don't want to go 'overkill' on the taste.

I love pumpkin ravioli's and other various fall squashes, and with the recent weather changes I wanted to enjoy the change in seasons.  I decided to make this recipe based on the pumpkin/cinnamon combination and to finally give in to the spirit of Autumn.


The hubby declared these 'light and fluffy, with a good amount of pumpkin flavor!'  He then wanted to know if this counted towards his daily intake of fruits and veggies.  When I told him, no, there's not enough pumpkin for that to count, he said 'then I should just eat more until it does!'  Sigh.

The original recipe was for a pumpkin cake. Eat Cake for Dinner did a combination of cake and cupcakes, while I just went straight for cupcakes.  If you would like to see the cake recipe, just click on the link below.

Pumpkin Cupcakes with Cinnamon Buttercream
Recipe adapted from Eat Cake for Dinner/Paula Deen

Makes approx. 2 dozen

Cupcake Ingredients:
1 cup unsalted butter, softened
1 cup sugar
1 cup firmly packed light brown sugar
4 large eggs
1 (15oz) can pumpkin
3 cups all-purpose flour
2 tsp baking powder
1 tsp ground cinnamon
1/2 tsp baking soda
1/4 tsp salt
3/4 cup milk

Preheat oven to 350 degrees.  Fill two cupcake pans with liners; set aside.  In a large bowl, beat butter and sugars at medium speed with a mixer, until fluffy.  Add eggs, one at a time, beating well after each addition.  Beat in pumpkin.  In a medium bowl, combine flour, baking powder, cinnamon, baking soda, and salt.  Gradually add to butter mixture alternating with milk, beginning and ending with flour mixture, beating until just combined after each addition.

Fill cupcake liners 2/3 full with batter.  Bake for 15-18 minutes, until a toothpick inserted in the center comes out clean.  Cool on wire racks before adding frosting.

Cinnamon Buttercream Ingredients:
1 cup butter, softened
1/2 tsp ground cinnamon
pinch of salt
5 cups powdered sugar
1/4 - 1/2 cup heavy whipping cream

In a large bowl, beat butter, cinnamon, and salt at a medium speed with a mixer until creamy.  Gradually add powdered sugar, beating until smooth.  Add cream and beat until frosting reaches desired consistency.


This post will be participating in the following Linky parties:

Saturday, October 08, 2011

Sweet Treats Saturday: Nutty Coconut Caramel Brownies

I've had a few chocolate-y recipes in the queue and was debating which to go forward with.  I took a vote from my co-workers and this one came up first.  The coconut/caramel combination was too much to resist.


And oh, was resistance futile. This was so delicious and a perfect combination of flavors.  The coconut wasn't overpowering, but was a nice blend with the almonds and caramel.

Nutty Coconut Caramel Brownies
Recipe from A Spicy Perspective

Ingredients
1 cup (2 sticks) unsalted butter
1 1/2 cups sugar
1/2 cup unsweetened cocoa powder
1/2 cup all-purpose flour
1 tsp salt
1 tbsp vanilla extract
4 eggs
12oz dark chocolate chunks, divided
2 - 14oz cans dulce de leche*
1/2 cup shredded coconut
1/2 cup sliced almonds

*I only had one can of dulce de leche and one can of condensed milk.  The dulce de leche was pretty thick on its own, so I mixed in half of the can of condensed milk before pour over the warm brownies.  I made sure it was smooth and completely blended before pouring on.  It was very easy to spread over the warm brownies, and didn't tear them apart.  The taste was divine - so I probably would do it the same way the next time I make it.


Instructions
1. Preheat the oven to 375 degrees F.  Set oven racks in the center and upper positions.  Spray a 9x13 pan with non-stick cooking spray.
2.  Melt the butter in a microwave safe bowl.  Then add the sugar and mix well.
3  Add the cocoa powder, flour, salt, and vanilla.  Whisk until smooth.  Then whisk in one egg at a time, until well combined.
4.  Measure out 1/2 cup chocolate chunks and reserve for later.  Mix in the rest of the chocolate chunks and pour the mixture into the prepared baking dish.
5.  Bake on the enter rack for approx. 20-25 minutes, until the center is set.
6.  Take the brownies out of the oven and increase the temperature to 400 degrees F.
7.  Gently spread the dulce de leche evenly over the top, being careful not to disturb the brownie crust.
8.  Sprinkle the coconut, almonds, and remaining chocolate chunks over the top and press a little.
9.  Place on the top rack of the oven to toast the coconut and almonds for 2-5 minutes.  Watch it carefully so that the coconut doesn't burn.
10.  Cool completely, so the caramel sets.  Cut and serve.

Thursday, October 06, 2011

Feeling so CapeAble

Throughout my web browsing/pinning, I've been seeing cute capes or cape-like jackets popping up.  I have a few on my wish list to make, including the Anthropologie belted, plaid cape. So drool worthy.


Anyways, I went on the hunt for a cape pattern and stumbled upon Simplicity 5359.  The pattern includes two cape options (one with a collar, one without) and a wiggle dress.  I love the dress too, so I've put that aside for a future project.  But I knew the cape would be perfect for a light, California fall day.


I decided to go with the collared cape as I didn't want it to look like a poncho, and I like that it then became almost coat like.


I used a brown wool for the outside and lined it in a light brown satin.  My poor, sensitive skin can't handle the chafing from the wool, so the delicate lining was a necessity.


I love how this turned out! It's so simple but adds a nice elegant touch to my Fall dresses.  I only received on 'you should be carrying as basket of apples' comment, and only in jest, but many compliments on my little cape.  

Fabric: Brown wool for exterior, tan satin for lining
Pattern: Vintage Simplicity 5359
Notions: Bias tape for a loop closure at the neck and a little hook and eye closure for extra security.


The pattern was so easy to put together and just a few pieces overall.  I had to do a bit of trimming at the collar area of the selvage as it was getting really thick with the wool, and then I under-stitched it to keep it in place.  I also did top-stitching around the edge of the cape, because I liked the look and it helped to minimize the bulk and the fabric shifting around.

I would love to make this again if another fabric 'called out' to me.  In the meantime, I'm on the hunt for a pattern similar to the Anthropologie jacket.  That can be my 'late Fall' project.

Wednesday, October 05, 2011

Self-Stitched September Recap and a Giveaway Winner

Oh Self-Stitched September! How glad I am that you're over. Just kidding.

Overall, it really wasn't bad.  In the year of blogging/sewing, I've made up quite a wardrobe for myself. And it was nice to revisit some of the garments that have been tucked away in the back of my closet.

Of the 30 days in September:

  • I only missed one day, because I really didn't even leave the house.
  • I photographed all days, except for two. I actually think it was only just one, but for the life of me I can't find my picture for day 29. I wore my grey Rooibos dress with the matching plaid belt.
  • I only wore a handful of repeats, usually separates.
My last day of Self-Stitched September was spent camping.  I didn't really have anything that I had sewn for those kind of conditions, but I did wear a cowl that I crocheted.


With the end of Self-Stitched September, also came the end of my month of giveaways.  I hadn't had a chance to pull the winner for the Whimsical Ornament Giveaway.  A few people submitted responses after the deadline so I unfortunately had to turn them away.  But the chances were pretty high for the two participants (3 entries) on the post.  And the winner is...


Yara!  

Congratulations Yara, I'll be reaching out to you to get your details for your prize.

Saturday, October 01, 2011

Sweet Treats Saturday: Chocolate Chip Coffee Cake

I've been wanting to make more coffee cakes. It's such a nice treat to have on the weekend with your morning cup of coffee, or when you have guests over for brunch.  When I found this recipe, I tucked it away for a nice Fall day to try it out.

Yes, this tastes as good as it looks
Chocolate Chip Coffee Cake
Recipe from Two Peas and Their Pod

Ingredients
2 cups all-purpose flour
1 1/2 tsp baking powder
1 tsp baking soda
1/2 tsp salt
1 cup granulated sugar
1/2 cup butter (1 stick) at room temperature
2 large eggs
1 cup sour cream
1 tsp vanilla extract
1 cup chocolate chips

Cinnamon Sugar Topping/Filling
1/4 cup granulated sugar
3 tbsp brown sugar
1 1/2 tsp cinnamon

Directions

1. Preheat the oven to 350 degrees F. Grease an 8-inch square baking pan and set aside.

2. In a medium bowl, whisk the flour, baking powder, baking soda, and salt.  Set the dry ingredients aside.

3.  Using an electric mixer, cream together the butter and 1 cup sugar until fluffy, about 5 minutes.  Add in the eggs, one at a time, beat until smooth.  Beat in the sour cream and vanilla extract.  Mix until well combined.

4.  Slowly add in the dry ingredients.  Mix until just combined.  In a small bowl, make the cinnamon sugar topping/filling.  Stir together sugar, brown sugar, and cinnamon.  Pour half the batter into the prepared cake pan and sprinkle with half the cinnamon sugar and half the chocolate chips.  Spoon the remaining batter over the filling, spreading gently.  Sprinkle with the remaining cinnamon-sugar and chocolate chips.

Ready to go into the oven

5.  Bake until golden and a toothpick inserted in the center comes out clean, about 40 minutes.  Cool to room temperature and serve.


Related Posts Plugin for WordPress, Blogger...