What's Up, Cupcake? Menu

Monday, November 08, 2010

Luck be a lady


It’s finished!  The seam ripper was my best friend in this project, but creating the muslin mockup ahead of time really helped me in this process.  
I was a little worried about the ‘Advanced’ level of the pattern, but I followed along Gertie’s posts and was very thorough in going through the directions.  It was a great sew along, but I might try for a slightly easier one next time.

Another success from this process? My first official button hole! I scrounged up the instruction manual to my sewing machine and practiced the 4-step button process.  It worked great and I'm no longer going to have to use zippers to close all of my garments.

Here are some pictures from along the way...

Muslin in progress

Now onto the actual fabric...

Attaching pockets...

Fitting the back...

Attached the sleeves...
Back view

With the tie... I think I like it better without.


Saturday, November 06, 2010

Sweet Treats Saturday: Fall Chip Cookies


This week I wanted to make some cookies to celebrate fall.  I love the seasonal colors of M&M's so I grabbed a couple of bags while out shopping, hoping to bake them into something wonderful.  That something turned out to be some kicked up chocolate chip cookies.  

A mixture of regular and peanut butter M&M's. Choose your favorite flavors and mix them!


Technically the chocolate chips were milk chocolate and peanut butter M&M's.  The fun colors put me in the seasonal spirit, and the peanut butter made it a nice treat from your typical chocolate chip cookie.  They came out crispy on the outside, and chewy on the inside... or as I like to call it, just right!


The recipe is fast and easy and can be found on Allrecipes.com (it's Anna's Chocolate Chip Cookies.  The link will take you straight to the recipe) or below:

Ingredients
1 cup butter
1/2 cup white sugar
1 cup packed brown sugar
1 teaspoon vanilla extract
2 eggs
2 1/2 cups all-purpose flour
1 teaspoon baking soda
1 teaspoon salt
2 cups chocolate chips or substitute (M&Ms, toffee, etc)

1. Preheat the oven to 375 degrees F (190 degrees C).
2. In a large bowl, cream together the butter and sugar until smooth. Beat in the vanilla and eggs one at a time. Combine the flour, baking soda and salt; stir into the sugar mixture. Finally, mix in the chocolate chips. Drop by tablespoonfuls onto ungreased cookie sheets.
3. Bake for 8 to 10 minutes in the preheated oven, or until edges are golden. Remove from baking sheet to cool on wire racks.

Thursday, November 04, 2010

Lady Grey Muslin Update

The long awaited Lady Grey update.  


True, it’s just the muslin, but rest assured, this is just a sneak peek.  I’m making good progress on the jacket and plan on finishing the jacket this weekend.  Stay tuned!


Wednesday, November 03, 2010

All Quiet on the Crafting Front

Well, not really that quiet, crafting... I'm working on a lot of projects and will start posting updates again tomorrow.  Had a busy Halloween weekend that included puppy-sitting, pumpkin carving, dance classes, etc.  I squeezed in as much crafting time as I could but had to postpone the blog posts for a few days.  Tomorrow you can expect an update on  the Lady Grey jacket and a lot more exciting projects and updates in the next few days.  Stay tuned!

Tuesday, November 02, 2010

Apron Collection

As promised, here's a peek at my apron collection.  Most were gifts or were purchased over the years, and a couple I made.  I love the half aprons especially but I the shapes of the full aprons are great and a bit more practical in the kitchen..

A few of my half aprons

Full size aprons

My favorite apron is actually the red and white check (second from the left in the top photo).  I love that it has a dish cloth that buttons on and off, along with a little pocket.  It's so practical and is the most loved of the bunch.  Whenever I'm done using it, I can just unbutton the towel and throw it in the wash separately.  I'd love to eventually make some additional half aprons with that feature.

Saturday, October 30, 2010

Sweet Treats Saturday: Candied Orange Peels

Happy day before Halloween!  The chances of consuming a lot of sweet treats are high this weekend, but these will probably not be found in any of your candy bags.


I've always wanted to make candied orange peels, but was under the impression that they were hard to make and extremely time consuming.  After searching many recipes, I found one that proved otherwise.

The orange tree in our yard is in full bloom so I was lucky to have all of the materials on hand.


I followed the recipe exactly but only used oranges.  Some things to note:
  • Make sure you remove the rind to avoid the flavor from the final orange peels.  You don't have to go overboard (I did, I was super cautious and made the peels very thin).  If you make them too thin, the orange peels become capsules of sugar. Literally, it seems like you are eating sugar with a side of orange.
  • A variation of the recipe could include dipping this in chocolate.  I can't wait to try this!
  • The peels are sweet from being saturated with the sugar mixture, so you don't have to garnish with too much sugar.  


Straight from simmering in the sugar mixture.  Ready to dry for an hour.
The orange peels turned out delicious! I'm going to have to make them again but dip half of the batch in chocolate.

Friday, October 29, 2010

Featured Friend Friday! Just My Type Blogger: Jess

My first Featured Friend Friday!  About once a month, I hope to feature a friend or fellow crafty blogger on What's Up, Cupcake? For my first feature, I thought it would be fitting to interview Jess, as she has encouraged and inspired me to do many of the crafts that I'm now doing.  We met through the Scottish Highland dance community and discovered we both love crafty things.  She got me into knitting, cross stitching, and even back into sewing again!  

Jess and I after a long, but successful day of competing!


Enough with the love fest, read on and you can learn more about the awesome crafts Jess does.


Jess blogs at Just My Type. More details on how to see more of her crafty projects at the bottom of this interview.

What inspires you?
That's kind of hard question to answer, in that there is no specific thing. I tend to have weird taste in a lot of things. I am constantly looking for either beauty, weirdness, or both in the world around me. (I think my flickr favorites is a good place to see that combination in action.) I get very inspired by being able to combine two (or more) of the things I love in life.
For example:


finished TartanHearts pieces to date
Highland dance and cross-stitch


Clessidra
Highland dance and knitting: (one day it'll be argyle knee socks. not quite yet!)


hardcore/punk music and tattoos: (not my photo!)

Flirty Girl - Lucky Charms
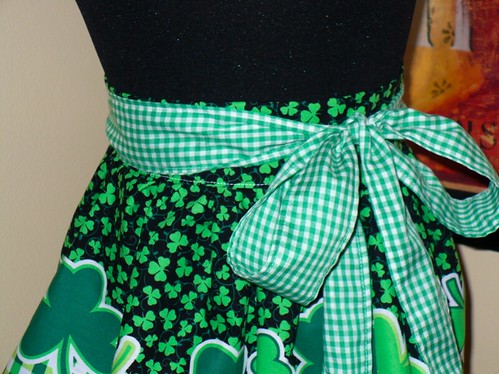
Irish-themed stuff and sewing

Rise above!  We're gonna rise above!
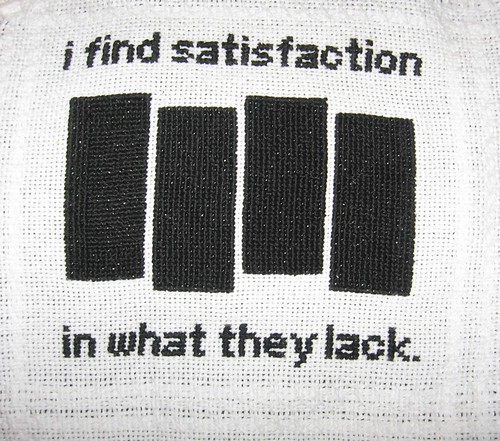
hardcore/punk and needlework
I also love things that make me laugh. Christine's Bedside Intruder cross-stitch is pretty high on that list right now. 

I'm also endlessly inspired by music. I listen to mostly hardcore and punk. I see bands I love every chance I get and had my dreams come true in getting to see the Cro-Mags earlier this year. I spend a lot of my weekends seeing bands in bars, garages, VFW halls, and wherever else I can. This doesn't come out as directly in my crafting as a lot of other things do. I'm hoping to change that, with the help of my cross-stitch pattern designing skills.

What is your craft space like? Where do you craft?
Complete and total chaos! I live with my parents, and thus have just my bedroom in which to craft. Which works for me. If it's not close and accessible when inspiration hits, I'll lose momentum or interest and projects will languish. I'm the kind where if I can't see it, it doesn't exist.

Let us in on your stash... what’s coming, what’s in progress, what are you stumped with?
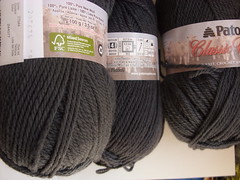
Well, I've got three sweaters worth of yarn that is practically begging to be knit with! As someone who really isn't a stasher, that's a LOT of yarn! I'm working on an Emelie with the Knit Picks Palette in Mustard. I've got the Palette in Grass (which I am in LOVE with) that didn't work out as a fingering weight Featherweigh Cardi. I've had the Patons Classic Wool in Mercury for a while, and can't totally decide on a pattern. 
I've also got a ball of Indisch Rot Wollemeise in my stash. It was a gift (!) and is so gorgeous. I'm thinking knee socks! 


wollemeise

I'm totally and completely stumped by the mass of yellow lace weight I bought during summer. I LOVE it; don't get me wrong. Yellow is my favorite color. 
Dandelion and Golden Glow comparison

What is your favorite craft to work with? (Sewing, knitting, etc)
I consider myself more of a knitter than anything. I do knit, crochet, sew, cross-stitch, embroider, blackwork, dye, and needle felt the odd thing. Lately embroidery in general, and cross-stitch especially, has been in the front of my mind. I seem to do better with crafts that are more linear (i.e. knitting and cross-stitch) than stuff that is more free-form (i.e. crochet and regular embroidery). After saying that, it probably comes as no surprise that I am someone who likes rules and guidelines and finds comfort in rituals.

What is your favorite thing that you’ve created so far?
Over-all, I think it's these blackwork samplers. I lost the fall/autumn pattern before I could do it, and kick myself all the time for that. I know I found them online somewhere. Ten years ago! (And seriously, if anyone knows where I could find the other one, I would be forever indebted.) I like summer the best. 
blackwork seasons samplers, summer

I also really love working with shrinky dinks. I love the way some of the rings I've made have come out. They're really delicate, but so cute and fun to make.

[365.2.53] more shrinky dinks
batty shrink ring


Knitting wise, it's my Pomatomus socks.
365.30

For crochet, it's the pink octopus that I made for my dear friend Kelley. I was supposed to make 10 for an event, and I'm so glad I never had to. 
oh no!

And sewing wise, it's definitely gotta be my Aboyne skirt and plaid. As a seriously horrible sewer, I'm super proud of it. I think a Jig dress is next for me. 
Scottish Lilt

Where can I read more? 
 

Thursday, October 28, 2010

Wish List: Mad Men Peggy Dress

While playing catchup with Mad Men episodes on our Tivo, I was instantly enamored by Peggy Olson's dress in episode 11.  I want to add this to my 'to sew' list but I need to begin a hunt for a similar pattern.


I love the blue/red combo, especially with the red peeking out in the skirt.  The two little buttons on the front are a fun accent.

Anyone have any pattern recommendations?  And what do you think of this season of Mad Men?

Wednesday, October 27, 2010

Super Easy Pet Blankets

Many of my friends have fur babies, and several became new parents this year. I’ve started assembling their Christmas blankets and as the weather starts to cool, it feels like the perfect time to work on this project.
Not only is this craft ridiculously easy and fast to whip up, but any extras you can make into blankets to be donated to your local animal shelter. The blankets are comfy, easy to clean, and pets will love them.  
My fleece choices. Two pattern pairs.
I am showing two options: non-sew and sew, but there are so many other combinations that you can do. 

Non-Sew Option

You can use one design where 1/2 - 1 yard will make one blanket.  If you use two different prints, you can probably get two blankets out of the fabric.

Two prints, wrong sides in the middle.
Once you have found a fleece design(s) that you like, cut into your desired size.  For a small to medium dog, I would recommend 36” square and move up from there.  Keep in mind that you’ll be losing 4” all around the blanket from the ties, so you may want to start large.  If you’re doing two patterns, cut out another piece into the same size.  

Cutting 4" strips around the side of the blanket, approx. 1" apart.
Place wrong sides together.  Cut 4” (approx... I’ve found that 4” or more work best to tie the knots) ‘strips’ 1” apart down each side of the blanket.  You will be cutting around the entire blanket.

Starting to tie double knots from the strips.
Once you have cut strips around the entire blanket, begin tying each pair (one from each side of the blanket).  I like to leave the last pair on each corner untied and snip them off once I have tied all of the ties.  I think it lays better that way.

Completed tie blanket.  If you trim longer strips around the edge, you won't have to tie your knots too tight and it will lay flat.  Just keep in mind the final blanket size when factoring in the size of your cut strips.
Sew Option
Choose your fabric (same as above instructions) and cut to desired size.  You don’t lose as much fabric around the edges so you can be closer to the actual size desired.  I use a 36” square for my medium size dog and it’s perfect for him.

Place right sides together and stitch the fleece together. I did a 3/4” edge.  Leave an opening in the middle of one side to invert the blanket inside out.

Opening to invert the blanket.
Once you have stitched all the way around, trim the corners so that they lay flat when inverted.  Turn the blanket inside out by pulling the fabric through the opening.  Finger press the sides flat and push the corners out.  

Pining the opening closed in preparation to stitch the edges.
Once you have flattened out the blanket, pin the opening inside in preparation to sew it closed.  Stitch the edge ultimately closing the opening and creating a small border.

Blanket complete! Showing double sides.
I like to just fold the blanket up, tie a bow around it and add a pet treat or toy.

Some finished blankets with their treats.
There you have it! An uber easy gift for your pet lover friends or your own fur baby.  

Wallace's new blanket is in place.
So comfy.


Related Posts Plugin for WordPress, Blogger...